Being Absolutely Certain Complex Parts Are Dimensionally Correct
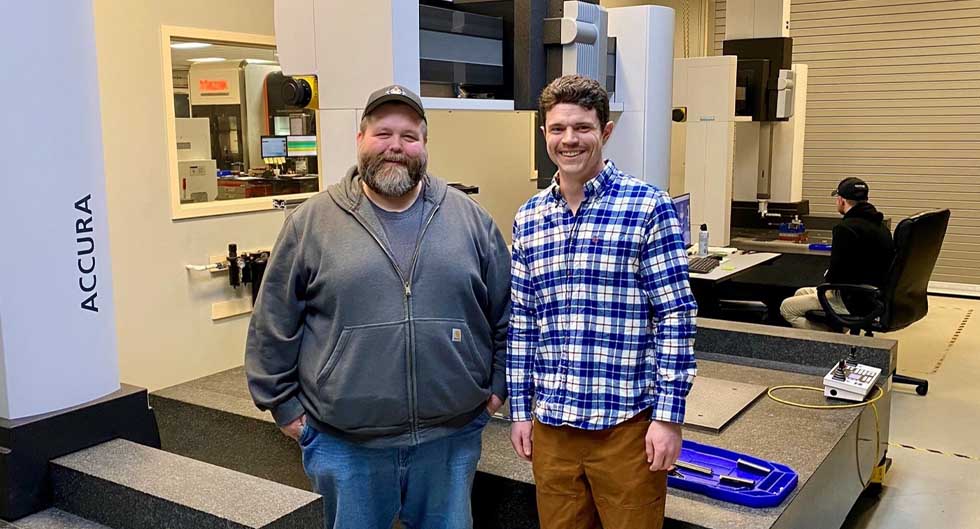
Compass Precision excels at making difficult components. Often these parts are geometrically complex, the kind that simple two-dimensional drawings struggle to describe. And frequently these components include nearly impossible tolerances on key dimensions. Manufacturing such parts requires advanced equipment (which Compass has) and highly skilled machinists (which Compass also has, in abundance). But how does the company know these components are dimensionally correct, first time and every time, after they are made? To better understand how this is possible, we sat down and spoke with one of Compass’s manufacturing masters, Gray Manufacturing’s Operations Manager Evan Grose (pictured above left, next to Gray’s Quality Manager Luke Honbarger).
Ok, We Get The Part About Compass Shops Being Able To Make Complex Parts. But How Do You Know They Are Good?
We use one of our three coordinate measuring machines (CMM) to measure and record dozens to hundreds of dimensions on each part we machine. The programs we write for these CMM’s allow the machines to run unattended while precisely measuring as many different dimensions as our customers and we need to be absolutely certain the parts completely meet the drawing and models dimensional requirements.
How Do These Coordinate Measuring Machines Work?
Hahaha… was hoping you would ask because this technology is amazing. After completing an initial part alignment, a CMM measures the geometry of machined components by sensing discrete points on the surface of the part using a probe. These measurements can be used to determine the linear distance between features. They can also be used to assess other geometric features like roundness, flatness, and perpendicularity.
That All Sounds Pretty Complicated. Is There An Easier Way to Explain What A CMM Does?
Think of it this way. A CMM is the measurement complement to a CNC mill or lathe. A CNC machine uses a cutting tool in contact with a part to create its geometry. A CMM then comes along and measures that geometry to verify that the component has been machined correctly. This also gives an effective way to communicate with the machinist as to what changes need to be made through data reporting.
Why Can’t These Measurements Be Done Manually?
Back in the old days, before components were so complicated and computing power was more limited, they were. But CMM’s can do things humans can’t. First, they are much faster, something that is very important when dozens or more points much be measured on each part. Second, they are incredibly more accurate. And finally, they are much better at determining complicated stuff like roundness, flatness, and true position of features.
How Are Accurate Are Coordinate Measuring Machines?
The CMM’s we have can routinely produce measurements within 0.0001 of an inch over the entire measurement range. We routinely calibrate our CMM’s using traceable standards and verify machine movement using gauges to ensure accuracy. We also utilize manufacturer-provided maintenance services that include full equipment calibration annually and parts replacement when necessary.
I Understand You Are Very Picky When It Comes To Buying Coordinate Measuring Machines. Why Is That?
We have three CMM’s at Gray. Compass has another seven CMM’s at other locations. All but one of these machines are Zeiss models. We regard Zeiss as the best, most advanced coordinate measuring machine in the world for complicated metal components. Don’t mean to turn this into a commercial for anyone, but Zeiss makes an outstanding CMM. Plus, its Calypso software is very intuitive, making the user interface simple. When you want to be the best, you need to have the best. We do.
Finally, What Would You Say To A Customer Looking To Select A Shop To Make Its Complicated Parts?
That’s simple. First make sure the shops you consider are capable from an equipment and manpower perspective of making the parts you need. The more complicated the part, the fewer shops there are that can handle it. But before you pick your vendor, ask him or her about how the part will be inspected to verify dimensional correctness. And if CMM’s are involved, inquire about what CMM make and model will be used. Then do a little homework concerning the answer. Really good shops will have really good CMM’s. Pick a vendor like that and you won’t be disappointed.
For more information about Gray Manufacturing and its coordinate measuring machine expertise, please contact Evan Grose directly at [email protected]. For background on Compass Precision, contact CEO Gary Holcomb at [email protected]

